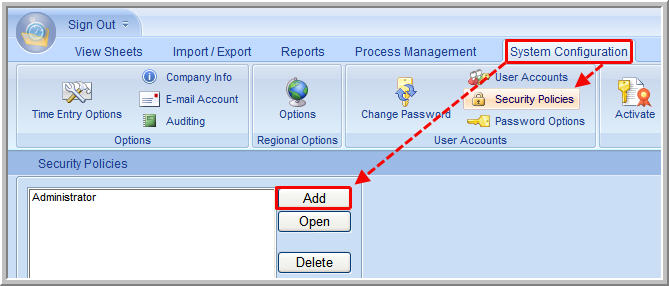
The following instructions applies to both Office Timesheets and Office Timesheets On Demand. The first step to create/edit/view a user's Security Policy is to by click on the "System Configuration" tab, and choose the "Security Policies" function button. Next click "Add" which will bring up the "Security Policies" dialog box.
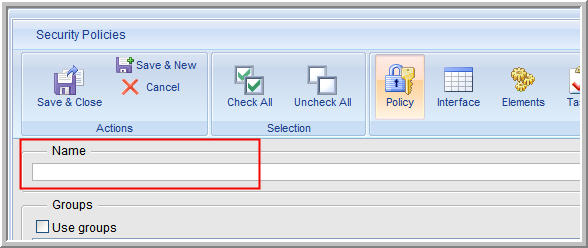
In the "Name" field type in the name of the Security Policy you would like to create. For Example: "Employee" or "Manager".
Assign policies to users or groups of users by configuring the appropriate options in the "Area" ribbon so as to control what the specific Security Policy will have access to for the different areas of the Office Timesheets or Office Timesheets On Demand application.
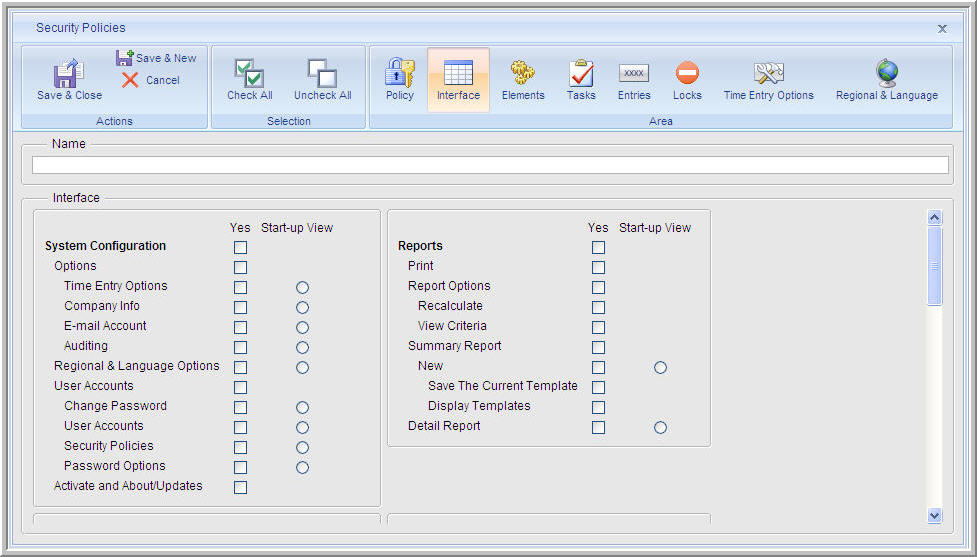
To create another Security Policy click on the "Save & New" function button. After the setup is complete and there is no desire to create another Security Policy, click on the "Save & Close" function button.
Once the Security Policies have been created and configured assign each user to a specific Security Policy.
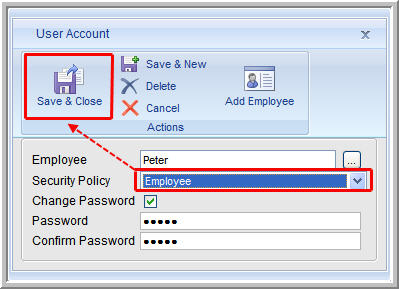
To view/edit the "Security Policies" for a specific user, please follow the steps below:
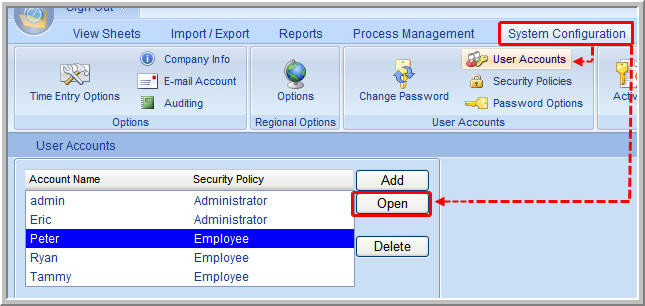
1) Go to the "System Configuration" tab and click on "User Accounts".
2) Highlight the desired user account and click "Open".
3) Click on the dropdown box and select the appropriate option for the user account.
4) Select the "Save and Close" option.
|